Search This Blog

Wednesday, August 31, 2016

Success and Failure


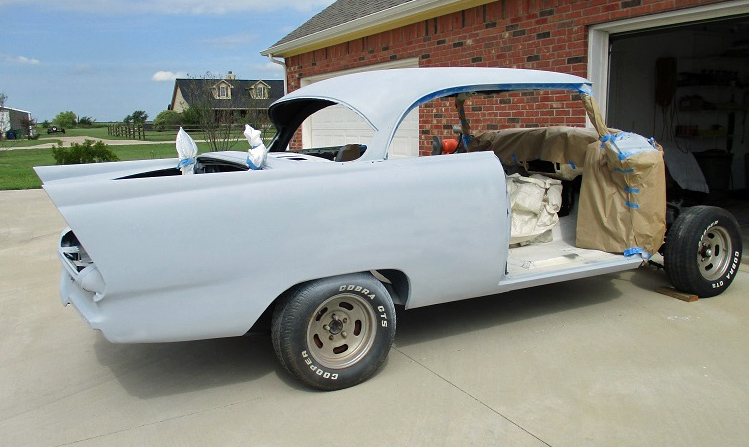
I’m done sanding the primer and it looks mostly good, but  a third coat is needed in a few areas to completely cover minor surface pitting. I also scuffed the painted jambs, so they are ready for the final coat. If tomorrow morning is calm as predicted, I should be able finish the last primer coat in less than an hour, and then another day to sand  and it will be ready to apply the first coat of color. More thunderstorms are predicted later this week, so I’m not sure when the painting will happen.
In past posts I’ve lamented the quality of tools, most of which are the proud product of the People’s Republic of China. One such tool, an air powered metal shear died after cutting up a four by eight sheet of 18 gauge mild steel and a half-sheet of 20ga. To be honest, the manual says it should not be used for anything heavier than 20 ga, so it was my own fault it died. Then, like a typical, stupid American customer, I replaced it with another of the same brand and model. This one managed to eviscerate the remaining half sheet of 20 ga, and a couple of cuts on some 18 ga, before it broke exactly like the first one. Fool me once, shame on you…fool me twice shame on me!


By now I’m convinced that Ingersoll-Rand won’t be on my list of replacements, so I read all the reviews and order a Campbell-Hausfeld that is similarly priced as the previous shears that failed. It failed before I finished cutting four small pieces of 20 gauge material! The reviews were good, but by now I’ve learned you can’t trust on-line reviews.
Since I still have quite a few parts and pieces to fab from metal of both thicknesses, I began a search for a heavier tool that didn’t require a second mortgage on the house to buy. There aren’t many choices available for the hobbyist, but I did find one that is rated for up to 14 ga, at about three times the price of the fragile tools it will replace. The new shear arrived in the mail a couple of days ago and I haven’t cut any metal yet, but it honestly looks no more rugged than the lower rated tools.  

Here’s the collection of broken tools and their latest replacement.


If this one goes belly-up, I guess I’ll just buy more cutting wheels for my Dremel, and good metal cutting blades for my saws.

Saturday, August 27, 2016

Primed

Yesterday morning was calm and in the seventies, so I was able to apply two coats of high-build primer. It will feel good to get a final pre-paint finish on at least the body

While waiting for that nice morning,  I built a shelf for the seat module and fuse blocks to mount inside the console.


I also tack welded as many of the console parts together as I could.


If the nice weather holds I'll get the body wet sanded in the next few days and give it a coat of paint, but if not, I think I'll install the engine. Seeing it sitting in place would give me some encouragement. 

Saturday, August 20, 2016

Wife's Favorite-Unchained Melody

One of my Favorite Instrumentals From 1956


Still Waiting

Heavy rain for two days and more predicted next week, so I can't prime and paint. My only progress has been cutting a few parts for the console and getting a head start on some minor body work.

I tried linking two videos, but the Blogger software isn't cooperating, so I can't even ling to a couple of songs from 1956 in the same post. So, I'll just add them in individual posts.

Think I'll go read a book until the Bristol race comes on....and Sunday will be a day to read and rest.

Friday, August 12, 2016

Back to Waiting

Once again the weather slows progress. It was windy enough that I wasn't able to apply the primer-surfacer before the deadline to overcoat the epoxy primer without sanding. The weather for the next ten days is expected to be showery, so I'm not in a big rush to work on the body.

After determining the locations for the A/C compressor and alternator, there was a need to install a spacer behind the crank pulley. Fortunately, the scrap metal bin had a piece of aluminum the exact thickness, so I made what I needed and got it installed.


It was surprisingly difficult to find flanged stub pipes that fit the exhaust manifolds. The stock exhaust pipe measured 1.55" while the manifold opening is about 1.75. These pipes measure 1.86" ID, so along with dual pipes flow should improve somewhat. With the stock manifolds hampering efficiency, removing burnt fuel will need some help to balance the intake side.

While the pipe and flanges look to be very high quality, the parts provided to attach them made me scratch my head. They only included one gasket, so I threw it in my gasket collection and replaced it with a pair of high quality Remflex gaskets. After frustrating experiences with stock exhaust and manifold gaskets on my slant six cars, I switched to Remflex and all the problems were cured.

The furnished bolts might be long enough to attach the flanges to a thin, stamped manifold, but they are 1/2" too short if using on cast iron manifolds. What's really strange is the models the manufacturer says this flange kit is supposed to fit are all foreign four-cylinders. Go figure!


I'm guessing not much else will be accomplished until the weather is more stable again.

Monday, August 8, 2016

Primed but not Pretty


The wind cooperated, but equipment less so.

The body was rolled out and wiped down before the sun had cleared the horizon. While the primer mix sat and did its thing for the recommended fifteen minutes, I got the HVLP sprayer hooked up with filter and pressure attachments, and air hose run outside.

I immediately had problems adjusting the spray pattern. The pattern would not spread as much as it should have, so there was a heavy spot in the middle surrounded by thin coverage, but I had to get started before the weather changed and the epoxy began to set. It worked t to a certain degree, but there were several runs due to the poor pattern, so that means more sanding. Nothing is ever easy!

Before I finished the first coat, it became apparent that I wasn’t getting enough air pressure and after playing with the pressure adjustments on the sprayer, I discovered that the line pressure was low. For some reason the shop circuit breaker had tripped and the compressor shut down. By the time I got going again, a breeze had started, but I still managed to apply two coats of epoxy. It looks like crap, but at least it’s covered!

When I disassembled and cleaned the gun, I found a tiny particle of dried paint stuck in the spray nozzle, so I suppose that was the cause of my problems. The last time I used that gun, I took extra care soaking all the parts in solvent and then blowing everything out, so I can’t figure where the paint particle came from. As usual, I filtered the each part when I filled the measuring cup, and then filtered the mixture again when I filled the gun, so I don’t think it got in there today.

Sunday, August 7, 2016

Missed by that Much!


Saturday was another calm morning and I hoped it would remain quiet enough to shoot the epoxy primer. I pushed the car outside soon after sunrise, but didn’t have quite enough time to do the job before the wind began. Another twenty minutes and I would have been finished.

The car was filthy dirty as it hadn’t been outside for a good cleaning in weeks,  so I had to spend a half-hour brushing, blowing and wiping before I could finish masking. I was nearly done masking when the wind came up. Though it wasn’t strong, it was too much to spray.

The forecast for this morning looks similar, so if I can roll it out before sunrise and give it a quick dusting while the primer mix is sitting, maybe I can get the job done. Then it has to receive the final build-primer coat within three days, or the epoxy would have to be sanded again and I really don’t want to do that.

As long as the car was outside, I decided to give the inside work area a good cleaning, and also rearrange the stacks of parts and materials that had been put aside for storage. It looks much better now and I have more elbow room.

I also had a chance to check my winch setup. While I can still roll it around myself, I won’t be able to do that after the drivetrain is installed. The winch worked okay until the cable angle became too steep and tripped the safety shutoff. I’ll have to try rigging a brace and pulley setup to reroute the cable path. Seems like there’s always something not directly related to the car that takes time and money! I can always use the come-along, but electric motors sure makes it easier.

Thursday, August 4, 2016

More Hurry up and Wait

Still passing time waiting for a little cooler weather and calm mornings. I was ready to roll it out the door and prime, but the wind was already too strong by 7am. By 10am, the forecasted 8-9mph was blowing at about 15.

I did manage to get the left exhaust manifold sand blasted, painted and installed. It's darker in color than the new casting, but nobody will be able to see both sides at the same time, and after a few months they will both be getting gray and rusty.

I also got more console sheet metal cut. Soon that project will be on hold as I can't finish the top plate until the transmission is in place and the shifter can be mounted in the proper location. Only thing left is to make a plate for the seat module and fuse blocks under the arm rest storage bin.