Search This Blog

Wednesday, December 30, 2015

Short Block Progress

Turned the heat on in the garage and started to assemble the engine. Except for the timing chain, I have the short block complete.

If it's warm enough tomorrow, there are a couple of small painting jobs I want to finish, so the rest of the engine assembly might have to wait until next year....


Friday, December 25, 2015

Christmas


Christmas activities have had priority, so the only work accomplished on the '56 was small parts cleaning, sketching some console designs, and finishing bolting the body to the frame. After a few minor tweaks to the front floor sheet metal, everything went surprisingly well.

Despite the flexible condition of the body from all the rust, while repairing and replacing panels, I managed to get everything aligned so that the thickest shim required was about 3/8". I'll take that and keep my fingers crossed that it didn't create any yet unseen problems.

Merry Christmas, and enjoy another Roy Orbison favorite.

Thursday, December 17, 2015

Radio Mockup

The radio/GPS unit finally arrived after being in transit 11 days from North Carolina. Not at all typical for something ordered and shipped from Amazon.

I did a quick mockup and it looks like it fits okay. Final assembly will be reserved for a cold day this winter


Spent a half-day removing rust and priming some of the remaining sheet metal and small parts. Every time I open a box I find something else that needs restoration.

I also welded up the trim holes on one of the fenders. The method I'm going to use to attach side trim won't require the usual clips that are always among the first rust targets.

Did a bit more shimming and fitting body mounts and ran into a couple more interference issues. Since I don't want to cut out and weld the floor sheet metal, I'll use the "bigger hammer" method to adjust a couple of the homemade floor patches. Nothing will be visible after everything is put together, but I still hate doing things like that, even on a daily driver.

Saturday, December 12, 2015

Lazy Day Puttering

With rain a couple hours away, I lost any ambition I might have had earlier this morning, so the only thing I managed to accomplish was to build a better mockup of the dash. Not as stock appearing as I had hoped, but I'm okay with it. I'm not even sure if I want to make the deeper gauge bezels that would look more like the OEM gauges.

Friday, December 11, 2015

Gauges and Body Mounts

Christmas lights and tree are up; finished some gift shopping, and the good weather is holding for one more day, so I was able to get back to the Plymouth for a short time.

The gauges arrived yesterday and they look very nice. I did a quick fit check on the dash and finished cutting the embossed trim plates so the dash can be assembled. The touch screen radio did not arrive as scheduled on the 10th, and is now estimated to arrive on the 15th. I guess the seasonal package load is responsible for the delay, so I think I'll save the dash-build for a cold weather project.

This picture is from the gauge fit check. Unfortunately, the embossed aluminum  is only 8 inches wide, so there will be a seam on each side. The holes under the gauges are for the upper A/C vents. The ignition switch will be on the steering column, so I had room to place the vents symmetrically.


I spent a couple of hours fitting and shimming the body mounts and discovered some interference problems between the aftermarket/homebuilt floor patches and the frame. Nothing that can't be fixed, but it will take some time to work it out.

I discovered another area of thin metal with pin hole rust-through on one of the fenders and decided to fabricate a patch. It required complex curves as it's located in the headlight area. Forming sheet metal is not my best skill, but I finally got it made, welded in and the welds ground down. I think I'll wait until it's on the car before I finish the welded joint with body filler, as it will be easier to shape when the fender isn't flexing.

Sunday, December 6, 2015

Progress!

I took advantage of the perfect weather to roll the frame inside and get it situated under the body.

To get enough clearance to roll it under, I had to strap down the high part of the frame to the axle housing. I needed about four inches more clearance, and the 1,000 lb. rated straps were really straining to hold it down.


I had almost no issues as I was able to pry and shift the frame until the chassis mounts were somewhat aligned.


Time to lower the body. This took the longest as I had to constantly check for clearance and alignment. I sure could have used help with this operation.

The body is now sitting on the frame. Most mounting holes are aligned okay, but the two  on the floor behind the driver might require shifting for the pads to fit. This was the area that had concerned me as the rocker panel and floor were so rotted that their location was an educated guess. The parts car was just as bad, so I wasn't able to get a good measurement from it either. At most I might have to move the holes about .25 inches, and it will be close if I have to move or modify the cups to get clearance. No big problem.

The only other glitch so far involved the gas tank. The two bolts that support the rear of the tank had to be cut off. I had purposely left them long to help get nuts started on the bolts, but they hit the frame. If I could do it over, I'd move the gas tank a half-inch forward, but that won't be an issue unless I have to remove the tank. I would have to loosen four body mounts and jack the body about an inch to get access to the nuts and drop the straps. If that's my worst problem, I won't complain.

At least the frame is inside and out of the winter storms. I can now finish the front brakes and also get accurate measurements to verify the motor and transmission mount locations.

I'm worn out for the day, and have other things scheduled for tomorrow, so it might be awhile before I can finish installing the body mounts. I hope to do some more painting while the weather is nice next week and body mounts can wait a few days if necessary.

Friday, December 4, 2015

Catching up


The weather is beautiful, and though I’m itching to work on the car, I’m probably stuck with the Christmas decoration detail today. I’m not going to put up as many lights as usual, but it will still take four or five hours…and then there is the tree. I’m not quite at the “bah…humbug!” stage, but I can see it from here. In the meantime, I’ll catch up the news on this week’s progress.

Received an email notification this morning that New Vintage had shipped my gauges, but for some unknown reason they shipped to my old address. I called and he said he thought the box had not been picked up yet and that they would try to stop shipment. Fortunately they did, and now the delivery date is 12-9.

I finally got the body lifting rig set up and tested, so I’m ready to roll the frame under the body. Now if I can find someone to help get everything lined up and body mounts installed I’ll have a reason to get excited about progress again. However, when I need help, friends always seem to have something better to do. I’ll probably end up doing everything alone, just as I did with the truck. Because the floor and mounting points were so badly rusted, placing the new mounts accurately was  difficult, and it sure would be nice to have a second set of eyes and hands during the mating operation.


I received a few more parts yesterday, including the new Chrysler Power intake manifold and a set of their finned aluminum valve covers. They really look nice, and I’m trying to decide how to paint them to give them a stock appearance. All gold would look closer to stock, but the fins are begging to be trimmed in black.


Got email notification that the touch screen Nav/Radio has been shipped. It’s a Kenwood with a Garmin GPS and the usual media capabilities. It’s not top of the line, but I tried it out at Best Buy and liked the features for the price. It also has provisions for a backup camera, and after having it on my van, I’ll never own another car without one. It’s scheduled to arrive between 12-9 and 12-12 .

Prepped some more parts for paint, and since the temps are supposed to warm up to near 70 next week, I’ll try to get them painted before cold, windy and wet weather returns.

The upholstery shop called wanting me to clarify a couple of things, and said it was going to be tight getting everything done by Christmas, so I let him off the hook and said the middle of January is fine. Until I get the body bolted down, the engine assembly complete, and more sheet metal installed, I really don’t want any more parts to take up space in the shop, so I really don’t need the seats until February.

Sunday, November 29, 2015

Thanksgiving Delays

Our Thanksgiving weekend company has gone home, but the heavy rains have returned. About 9" have fallen since last Wednesday, and at least one more day of bad weather to go. To top it off, my geothermal heating system quit on Friday. That's the fifth time it's failed in two years, and as usual, it happened on a weekend. One more thing to keep me away from working on the car.

My plans to roll the frame inside have now been delayed until I can get outside to work again. I also have to figure a better way to lift, support, and lower the body by myself. When I restored my '73 D100, I used jacks and blocks, but it was a slow process and I don't want to do that again. I have an electric winch mounted on the wall that will be used to pull the frame inside the shop, but the angle it's attached to the wall won't allow it to be used to hoist the body without a complicated pulley arrangement. I'll have to rig up an anchor point in another place so I can use a come-along to do the lifting.

Notice that Blogger has apparently fixed their photo posting software issue with Windows 10. I replaced a couple of pictures in previous posts so they are easier to see details.

And just for the curious...no, I won't be using that rope to lift the body, though the max rating is close to strong enough. I have a 1/4" cable to make sure it will do the job. The ceiling anchor is also more than adequate as it's a threaded shaft that is secured by a brace across the ceiling joists in the attic, and the eye-hook is rated at 2,000 lb. Since four of us carried the body without much difficulty, it probably weighs around 300 lb.

Saturday, November 21, 2015

Pink and Dad


A better song than many that made the charts during the war, but since dad is wearing an Air Force cap, I might be a little bit prejudiced.

I often criticize modern singers for lack of real talent, but this young woman can sing with the best of them. Now if there were more songs written without the tasteless and violent themes and gutter language...

Thursday, November 12, 2015

Let There be Color!

I finally got around to putting a coat of paint on the jams and fire wall. The color is definitely the correct match for '57 Fury Sand Dune white, and I like it. Yesterday I picked up another quart so I can do the trunk and other hard-to-reach areas. For the inside areas covered by trim panels I'll use up the pint of incorrect color so it won't go to waste.


The pushbutton and park lever linkage is beginning to take shape. The biggest problem has been designing it so the brackets can be attached to the shifter assembly after it and the housing are installed in the dash, and also to determine a method to adjust cable length after everything is hooked up.

With winter coming, I had better give some priority to mating the body and frame. Now that the rockers are painted, the rest of the areas that need paint can be reached with the body resting on the frame.

I talked to the upholstery shop and he thinks he can finish by Christmas, but didn't commit to it. I'd be perfectly happy if he can finish by sometime in February, but I didn't tell him that.

Sunday, November 8, 2015

Transmission Linkage Mockup


It took a lot of trial an error , but I'm pleased with the operation of the transmission linkage mockup. This setup is nearly perfect for the ratio needed to transfer .82" of pushbutton cable travel to the 2.5" needed to operate the transmission shifter arm. Only minor hole relocation will be needed, so the next iteration will be the final design. I'm also pleased that the force needed to push the rod with one finger is not excessive, so things are looking brighter. Now I can proceed with the final design of the linkage at the pushbutton end.


Dash Project

The gauge mounting modifications are complete and the dash is painted. I received the artwork for the custom gauges from New Vintage and notified them to begin building. I had to eliminate the custom graphics that would have matched the OEM font and style, but their "69 Series" gauges are not too much different than the stock design. The only customization I ordered is the inclusion of LED turn signal and headlight indicators in the speedometer face.


Friday, October 30, 2015

Seats and Little Stuff

Seats and door panels went into the upholstery shop yesterday. I had a difficult time deciding what color vinyl to use, as there was nothing that perfectly matched the OEM exterior paint shade that I'm also using on the dash.  After considering dozens of samples, I decided to go with a medium tan that matches the fabric nicely and also the leather that will be used on the steering wheel wrap. It should also look good with the bright, stainless steel window frames and gold/brass trim.

The dash is ready for paint, and I'll try to accomplish that this weekend. If the weather improves, I might also push the car outside and paint the door jams and firewall, since they are all the same color.

Ordered windshield wiper blades and a few trim pieces for the interior.

I was lucky to run across a dealer script from Eastside Chrysler Plymouth in Aurora, CO. It was the dealer I used for repairs when I was stationed at Lowry AFB, and is the dealership where the main character in my novel would have bought his '56 Fury, since it was not far from the base. It seems appropriate to put it on my car...if it ever gets on the road.

The redesigned park lever and shifter cable arrangement is getting closer to reality. The cardboard mockup works okay, and now I only have to make a bell crank and a bracket to mount it to the transmission case so I can test the operation. I'm keeping my fingers crossed, as I'd really like to keep the pushbutton shifter!

Still haven't decided on the gauges. I really hate spending that much, but will have to decide soon.

Thursday, October 22, 2015

Before the Rain

Heavy rains predicted for the next week, so with perfect temps the last few days  I concentrated on doing things that I prefer to work on outside. Solvent cleaned and wire brushed bolts, brackets, and misc small parts.

Finished rust removal and surface prep, repairing, and tack-welding one fender.


Added filler rings in all gauge mounting holes and eliminated the dash speaker grille since it matched the speedometer dimensions and now I'll be using a smaller gauge. Instead of going through the trouble of modifying the grille, I decided to get rid of it. I'm modifying the dash more than originally planned, but since duplicating the OEM gauge design is too expensive, I'll concentrate on making it more attractive and functional. However, though no longer symmetrical it should still look somewhat original.


Engine is ready to assemble, so I'll have an indoor job to work on until the weather clears again. Had to clean lots of rust and scale from the water jacket.


Everything scheduled for the upholstery shop is ready to go. Just waiting for word to take it in.

Thursday, October 15, 2015

Photo Posting Problems Continue

I still can't post photos using the blog JPG download feature, but will try adding a couple by inserting a PDF file.

Got a quote from the gauge manufacturer, but it was a shock. Three years ago I bought a five-gauge set for just over $600, but this time they want nearly $1,900 for a set! There was to be more custom design to better match the OEM style, but just the standard gauges were double the previous price.

I'm about ready to begin assembling the engine, so I'm cleaning, prepping and painting all the little stuff. The pan had a sharp dent, so had to beat it out and weld to be sure there were no pinholes to leak.

A week to go before I'm scheduled to bring the seats in to be reupholstered, and I'm still debating a color change for some of the vinyl!

 A quick mockup to see if the button force will be excessive gives me hope. I'd really like to make that mod a success. Also redesigning the park lever hardware to see if I can better fit it behind the dash.

America Also has it's Talented Youngsters..Lennon and Maisy

Sunday, October 11, 2015

Another Dutch Musical Wonder!-Amira Willighagen


Just another 9-year old with a bit of talent.

Saturday, October 10, 2015

Picked up the transmission

True to his word that it would be two weeks, my transmission builder called me to pick it up yesterday. To my pleasant surprise, the bill was $200 less than the estimate, and that included having to send the converter to TN to have it rebuilt as there were no rebuilt parts stocked in the DFW area. He said that mechanically the internals were in excellent condition and only the clutches were toast.

The shift detent spring was replaced and now you only have to gently nudge it with one finger to make it shift. I hope the pushbutton detent will be enough to hold it in gear! Maybe I'll still have to go with a floor shifter and change the detent spring back, but it's fun to experiment with a way to use the original PowerFlite pod with five TorqueFlite buttons and a park lever.

There is some progress in other areas as I started replacing rusted sheet metal on the fenders while waiting for parts to arrive. The old NOS patch panels fit perfectly.

I've also been working with the engineer at New Vintage USA, the gauge manufacturer I've used in the past. The only serious problem is the speedometer. The '56 speedometer is larger than anyone in the aftermarket offers, so what I want would have to be custom made, which means paying for CAD time and tooling. Not sure which way I want to go yet. Once they develop the tooling, other '55-'56 Mopar owners would have a source for a modern big gauge for their modified cars. My bet is that Dodge and Desoto speedometers are the same size as the Plymouth version, and would only need a face with different artwork to make them look OEM.

I'll also have to modify the dash to fit the new gauges, but nothing too radical. The difficult part will be making everything appear factory designed and built.

Tuesday, October 6, 2015

Upholstery

I visited the upholstery shop this morning and tentatively checked the vinyl colors. One problem I discovered was that no currently produced material perfectly matches the dash color. The choices I have are to find a better matching obsolete material from the warehouse stock, and hoping there is enough for the job, or changing the dash color to more closely match a currently available vinyl so we can use a current product.

We found several current samples that would look fine with the stock exterior color, so using that shade on the interior metal might be a better solution. He said that it would be about two weeks before he will be ready to start my job, so I have that long to make a decision about paint.

Speaking of two weeks, my transmission should be ready any day if that shop's schedule didn't change. I told him the date wasn't critical, and that he could delay mine if someone came in with a transmission problem and was desperate for repair.

Friday, October 2, 2015

Blogger Problems

I've been trying to post pictures for days, but since upgrading to Windows 10 the Blogger program is flaky and when I download the picture it locks up the program.  Windows 10 is great in many ways, but blogger.com has posted a notice that it does not support 10 and that problems can be expected.

The help forum suggestions don't fix anything, so it may be awhile before they update their software and I can get back to posting.

Sunday, September 20, 2015

Changes...Again

The deeper I get into this project, the crazier it gets, as I find myself running in circles and changing plans nearly every day.

I had just about given up on the idea of using the pushbutton shifter I modified, but learned that my high-detent force worry might be resolved by using a '65 model detent spring in the '66 transmission. I ordered one to try out and received an email that it's already been shipped and should be here this Wednesday. Thanks to Slant Six Dan for the info, and to Pat Blais for the outstanding response!

I also decided not to build individual bucket seats for the rear, and instead to use the stock bench seat. It would have been nice, but I have far too many other time consuming tasks to take care of if I want to get this car on the road sometime next year.

Friday, September 18, 2015

Console Mockup

Still working on things that need to be decided before the seats and side panels can go out to be reupholstered. The current project to mockup console and rear seats to establish dimensions is nearly done, but a problem with this website won't let me post pictures. Still not working right, but will try a copy and paste.


It works, but as a thumbnail only. Might have something to do with Windows 10 that I recently installed.

Wednesday, September 9, 2015

Still Plugging Away


Sometimes it seems as if nothing important takes place with my project. Though I’ve been able to work 2-3 hours a day since I got back from my trip, I have no pictures to document progress. I finished the cosmetic modifications to the steering column to make it look more like the original, and installed the ignition and turn signal switches, but it will need a re-paint before photos.

I’ve also been wire brushing, cleaning, de-rusting and repairing several body pats so they can be installed or taken to the upholstery shop. Door panel stainless trim is getting polished, and I completed a mockup of the redesigned door panels. They will look like a cross between the OEM Fury and Belvedere. I would have liked to use the Fury parts, but they were missing on the parts car.

Also spent a few hours on the customized steering wheel and horn ring assembly. About the time I decide which way to proceed, I come up with a better idea…or at least a different plan. It may be the last thing completed!

I finally decided the configuration for the console and purchased material for it this morning. I need to complete the frame before I can design the custom rear bucket seat frames that will need to go in with the front seats to be recovered. I’m still not sure if I can use the modified pushbutton shifter, or if I will have to use the A-body floor shift, so there are still decisions to be made about the cover and internal parts of the console. I can make that determination later as long as the external dimensions of the console frame don’t change.

Saturday, August 29, 2015

Back in the Saddle

It's amazing how far behind you can get by taking a two week "vacation. When I got home, the yard looked like a parched jungle despite having an automated sprinkler system for much of it. The lawn wasn't too bad, but I've spent a week trying to resuscitate wilted trees and shrubs. Unfortunately, I fear that several will not make it. Besides the heat damage, my Knockout Roses were hit with a virus..."rose rosette"...that's said to be fatal in most cases. No more roses for my yard, even the ones that claim to be disease resistant.

Small jobs are all I've been able to get done when it comes to the car. I had to make some dimensional changes on the seat mounting brackets, but now have the seats placed correctly. I'd like to take the seats in to be reupholstered, but they want the rear seats at the same time and I have yet to start work on them. Since the bench portion will be highly modified, it may be awhile before I get them ready.


After comparing the ivory color I used for the steering wheel column and dash to the exterior color and the fabric, I decided it contained too much yellow to match properly, and it was too shiny. I found a more muted cream color in the paint store book, so I had them mix a pint and add a dab of flattening agent to soften the shine. I should be able to re-paint the steering column this weekend.

The rear seat arm rest panels were in pretty bad shape with rust damage. It took lots of time with a wire wheel and sander to get them ready to re-cover.


Still trying to come up with a period-appearing design for the horn ring and steering wheel center trim, but I'm not satisfied with anything I've tried so far. It's not needed anytime soon, but it's a project I can contemplate when I have only a few minutes at a time.

I ordered Duplicolor, ceramic, silver engine paint online yesterday and it's already been shipped, so maybe I can begin assembling the engine in the next week or two. It would be nice to get some of the big parts out of my way so I can quit stumbling over them.

Sunday, August 2, 2015

More Parts and Material

A Cloyes double roller timing set from Rockauto, and Melling pushrods from Gary Pavlovich are all I needed to build the long block, but that will have to wait until I get back from my two week trip north. I still don't have the oil pump, but it's been shipped and should arrive before I leave.


The seat fabric arrived much faster than expected, and as soon as I finish locating the passenger seat in the correct position, I'll visit the upholstery shop and make an appointment to bring them in.


I also received a sample of the leather I'll use to wrap the steering wheel. The color is "Sand", which looked perfect on their website, but a bit too brown in real life. The picture I took makes it look even more brown, but with gold highlights that aren't there under normal light. I'll take it with me when I select vinyl fabrics and see if I can make a match that looks nice, but I'll probably use black since at least some Furys came with a black steering wheel and they looked fine.

Still unsure what to do about the ignition. The original points distributor is in great shape, and with the horrible quality of so many foreign made car parts, I'm hesitant about converting to an electronic system. If the points and condenser go bad along the highway, I can swap a set and get it running in 10 minutes or less. The car will not be raced, and I doubt I would wear out a set of points in my lifetime, and it won't be driven in cold weather, so I just might stay with the old technology...at least for a while.

Tuesday, July 28, 2015

Back to work...as soon as the house AC is repaired!

Typical weekend timing as the house air conditioning failed yet again! It must have another refrigerant leak, as the electronics are working, but the cooling air is not very cold. The repairman will be out this afternoon.
However, since my honey-do projects are complete for a few days, it's back to work on the car. A part I had ordered for the steering wheel customization arrived, so if it's too hot to work on the car I can get back to designing the wheel.

I ordered the seat fabric, and when it arrives the Sebring seats go to the upholsterer with an expected 6-8 weeks to complete. I was slightly disappointed when he said won't replace the seat belts with a matching color due to federal regulations. The only option is to find some stock parts that are close to matching, but I'd need the entire retractor assembly, so I'll just have to get by with gray belts.

Sunday, July 19, 2015

Lots of Parts

I picked up the engine from the machine shop and mounted the block on a new engine stand.

The crankshaft was in good shape and only needed polishing. All the valves were replaced with high quality stainless parts and hardened seats were installed. I won't even unwrap them until they are ready to install. The bill was a pleasant surprise at just over $1400 and that included the gasket set, US sourced Clevite rod and main bearings, rods resized, and the pistons I furnished installed. A new intermediate shaft bushing was pressed in, as were cam bearings and brass freeze plugs. Having a performance machine shop nearby is a blessing, and one that does work for a reasonable price is almost unheard of.
 
Fabric samples also arrived. Two of them were similar to '57-'59 patterns, but I couldn't find samples of anything similar to '56. The light one with the odd pattern is somewhat like what I saw on a '56 Fury that had be "restified", but I think the color might look washed-out if paired with the creamy white vinyl I visualize. I like both of the darker, patterned fabrics, and am leaning toward the top one, as it appears a bit more gold in bright light. While not original, it does look period correct, so I'll take it in to the upholstery shop and match it to available vinyl and carpet.
 
 I won't be using a lot of the fabric, as I think it might look too busy, so I only plan to put it in the center portions of the seats and an accent section on the door panels. Carpet will also be darker and probably a deep pile.
 

Monday, July 13, 2015

Upholstery Fabric

Though the interior will be a drastic change from stock, my intent is to have it look period correct wherever possible. I could order the original design Fury fabric from SLS, but if customer comments are to be believed, it could take years to get it. Instead, I'll try to find a fabric pattern that looks as if it could have been used on a fifties Chrysler product. I ordered several samples from an online supplier that I can take to the upholsterer for color matching to his vinyl and carpet samples.

Sunday, July 12, 2015

Parts Ordering Day

Ordered cam and lifters from Gary Pavlovich. I decided on the mild version 256 cam, as I don't intend to race and this one should provide good torque. With the tall rear end gears, torque will be appreciated, and mileage should be decent.

Also ordered metal to construct the steering wheel horn ring. I think I've decided on the center I want and will get to work making it.

Saturday, July 11, 2015

Paint Saga Continues

I never thought procuring the correct '57 Fury paint would be an issue, but I think it might finally be resolved.

After two weeks of hearing nothing back from the painter who was going to have the supplier scan the actual '57 Fury, I stopped at the paint shop to find out what was happening. After some confused conversation and a couple of phone calls, it was determined that they had scanned it and determined the proper Delfleet code. They mixed a pint, put it in a box, and I was on my way. Unfortunately, I neglected to look at the smear on the top of the can until I got home. At least this time it wasn't a grayish white...it was dark gray! More phone calls, an hour wait, and another thirty mile round trip, but this time the color looks right.


Going with the Delfleet product instead of Deltron was at the suggestion of the painter. He said it better matches the OEM paint and saves several hundred dollars. I can get two gallons for less than one gallon of the other, and since I don't want the modern look, it might be a better choice.

Gary Pavlovich sent me the cam specs which I dropped off a stock cam, but decided to go with a torque grind from Gary, so a spring upgrade was needed.

Saturday, July 4, 2015

Summer Doldrums

The arrival of hot weather and with too much rain-delayed yard work having priority over car hobbies, so I'm still playing catch-up. It's outside to work after breakfast and by noon I'm worn out and sweated out, with little enthusiasm or energy to take on the bigger restoration tasks I should be doing. Instead, I'm puttering away on little things like trying different steering wheel designs that won't look terribly out of place.

After watching Texas Rising on TV last month, I've developed a renewed appreciation for my adopted state's unique and colorful history, despite all the inaccuracies depicted in the show. So, instead of some trivial description of my Mopar puttering, here's Johnny Cash with a little taste of Texas music along with a few brief glimpses of an old Sweptline Dodge.


Sunday, June 21, 2015

Monday, June 15, 2015

Pistons!

Pistons arrived already. No indication where they were made, but the quality looks good and they came with Grant rings made in the USA.

Still not sure what to do about paint. The can of gray-ish Sand Dune White can be used in hidden places, but I have no faith that they can match the OEM shade using modern paints. I might have to go with Cool Vanilla and be happy, as I have no wish to start custom mixing colors that may or may not match.

Tuesday, June 9, 2015

Driveline Progress

Took the transmission to Harold's shop in Denton. He has rebuilt two other 727s for me and I had no problems. Heavy workload means it may be a few weeks before it's complete, but I told him that was fine.

Engine went to Wayne Calvert's machine shop with the same agreement. In his seventies, he still builds high performance engines and has a stellar reputation in the DFW area.

I'll have to order pistons from ebay ad, as Calvert couldn't find another source. Cylinders were quite clean and he said .020 oversize would probably be fine, but I'll order .030 or .040, depending what the seller has in stock.

Saturday, June 6, 2015

Another Issue to Resolve

I picked up a pint of what is supposed to be 1957 Fury color Sand Dune White. Apparently, something fails when translating the original color code to a modern mixture. The color is far too gray without even a hint of beige. I've seen '57 Fury restorations where the paint had pink tones, which is also incorrect. With the high tech equipment they now use to scan and match paint chips, it's odd they can't do a better match of OEM paint.

I'm now stuck with either trying to custom mix a more accurate shade, or visiting another paint store to see if they can do better.

Tuesday, June 2, 2015

More Parts Arrive

The ignition switch and turn signal switch I ordered from Rockauto arrived sooner than expected. At least they weren't made in communist China, and in my experience Taiwan produces better quality than their mainland cousins.

With dry, sunny weather expected for a few days, I have too much yard work to leave time for car projects, but after the wife flies for Belize on Saturday for a two week stay, I might be able to reprioritize some of my time.

Saturday, May 30, 2015

5" of Rain in Past Three Days, but a Little More Progress

Working between storms, I managed to get the steering column painted and the front shock slots enlarged to fit the '56 bolt size. Not too sure if the ivory shade is quite what I want. It appears more yellow than I expected.


Also did some experimentation on the steering wheel design. It's easy to make the horn function with custom parts, but making the center cap and horn ring trim look period is something else.

Yesterday I ordered a part from Summit and it arrived today! Like so many things I order online, the $4 part advertised free shipping, but the handling charge was over $5. Even so, it beats driving around trying to find the part I wanted locally.

Thursday, May 28, 2015

Wind, Hail, Torrential Rain, and Some Car Progress

Worst storm I've experienced since moving to Texas hit last night. Our vinyl fence was punctured in several places by hail, and one section blew down in the estimated 70mph wind. Plants were shredded and broken, and trees planted this spring were blown over. I know we had a drought, but it doesn't work trying to dump five years worth of water on us in one month. Please, Mother Nature, save a little for this fall!

I disassembled and primed the steering column, cleaned the key cylinder and removed the wheel lock parts, as I see no reason for it to be functioning on this car.

Since everything is disassembled, I ordered new ignition and turn signal switches. The ignition switch was replaced at some point, but the harness had been cut and spliced, and the work was sloppy. I may regret replacing switches as I'm sure the replacements are Chinese built.

The shock absorbers arrived this afternoon, but can't install them until it dries out a little bit.

Friday, May 22, 2015

Steering Column Test Fit

First the weather report: More rain today, and more predicted every day for the next ten.

I received the Dodge truck steering column yesterday and did a test fit today. Using the '56 column support would have required too much custom work, so I decided to use the truck method. The column is the collapsible version, so the support is designed to slip apart for the collapse to take place properly in an accident. That feature required a custom support that was quickly made from angle iron.
Once the column was in place, I was able to check the measurements against the stock setup, and was surprised to discover that every dimension was within a half-inch of stock! Even the rag joint connection will fall in the perfect position. Since both the '56 and the truck shafts are 1" dia, it should be a simple job to join them. The trick will be joining them so that the steering wheel aligns properly. The best bet is probably to cut another groove in the steering wheel keying flat so there are grooves all the way around and create thirty-six positions for adjustment.

It will need some sort of trim to hide the support and wire loom, but that shouldn't be difficult. I will also have to modify the sheet metal where the column goes through the floor, but carpet will cover that. I did change my wheel selection to the one shown in the picture. It's from a mid-late seventies model, and though it's 15" diameter might be  small for manual steering, it looks a little more car-like than the one I first considered. Otherwise, the column looks much like a factory installation.

Tuesday, May 19, 2015

Slight change of Plans

Since the beginning of my project, I had planned to use a Flaming River or Ididit tilt steering column, mostly so I could have a column-mounted ignition switch, as well as emergency flashers and a modern turn signal harness with lane changing feature.

After doing more research and seeking opinions on HAMB and other forums, I learned that the quality of aftermarket columns is not that great. Another strike against that option is the steering wheel limitation. They do not have a Mopar spline available on the shaft, so it was either an aftermarket wheel with an adapter, or a GM, neither of which I wanted. The alternative was to make my own Mopar adapter, which was a little too complicated and time consuming. The total cost would be in the neighborhood of $1000...not a very friendly neighborhood, and I haven't found an aftermarket wheel that I like and would look right on a '56.

I sought another option and after some ebay searching and more measuring, I decided to buy a column from a mid-eighties Dodge truck.

It is almost exactly the same length as the '56 column. It has the switch, turn signals and flashers I want, plus the crash collapsible design that was not available on the aftermarket version I needed. I will have the choice of dozens of Mopar steering wheel styles that are a direct fit, and at $120, the price is way more palatable. It would be nice to have the tilt feature, but for the price I can live without it.

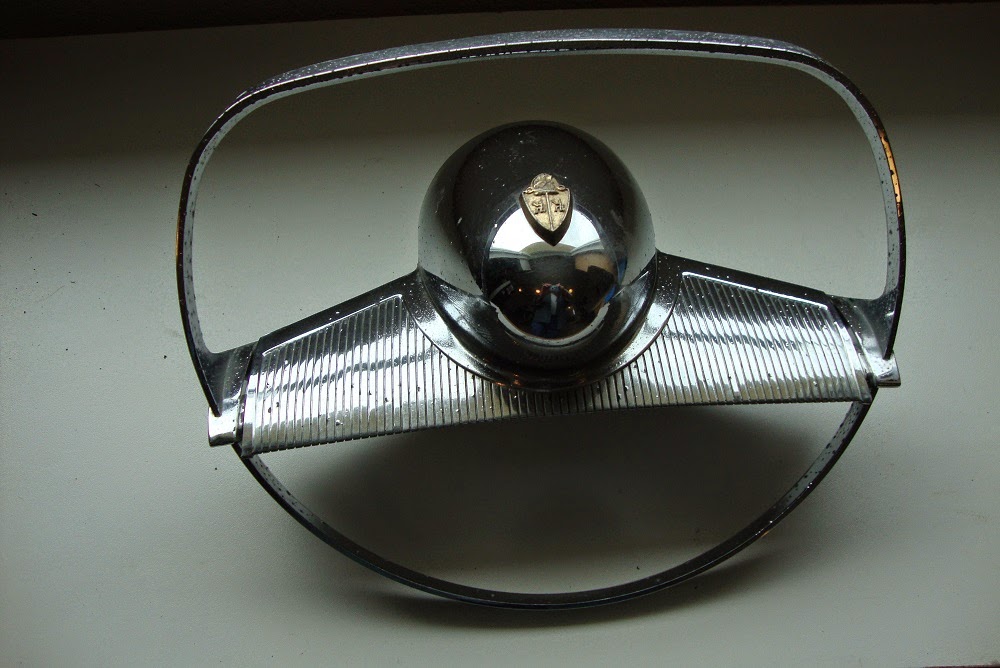
I have several steering wheels that would work, but I'm leaning toward the wheel I swapped out of my '73 D100.

It is 1/2" smaller diameter than the stock wheel, and is slightly dished, which makes me more comfortable than having that bone-crushing point on the Hollywood wheel sitting in front of my chest.
I would replace the horn button with something more period correct, but the wheel diameter is about right for manual steering. I also have a nice wheel that would look better, but it's only 15" in diameter which might make steering a little too heavy. At least I will have more options while keeping the car more Mopar.

Thursday, May 14, 2015

5-14-15

Nearly two weeks of rain, wind and thunderstorms have slowed progress. Reservoirs that were dry only six weeks ago are now overflowing and low-lying areas are under water, including spots in my yard. When I cut grass between storms a couple of days ago, I had to mow around several "ponds", or risk getting the mower stuck in the greasy clay.

Several household projects have also kept me out of the workshop, but the guestroom now has built-in cabinets , new closet shelving, and all new furniture.

With thunderstorms in the forecast for at least the next ten days, plans to fit check the engine and transmission mounts will be delayed or dropped since it would have to take place outside where the frame is stored. I'll probably just take the block and heads in to the machine shop and hope everything fits when it's time to install the engine.

Since I refilled the welder's gas canister, put on a new roll of wire, and bought new welding gloves, it might be time to install the lower fender patch panels. That will be the last major sheet metal repair needed. It's difficult to get motivated for some jobs, but they have to be done and it feels good when complete and out of the way.

Friday, May 1, 2015

Ready for a Powertrain

Finished fabricating the transmission crossmember and welding in place. If I roll the frame onto the concrete, I could bolt the transmission and engine block together to fit check the mounts. If the weather holds until Monday, I might do that.

Tuesday, April 28, 2015

Between Thunderstorms

A break in the thunderstorm pattern allowed me enough dry time to fit check the transmission crossmember. It needs some trimming and cutouts for the exhaust pipes, but it looks like the basic shape will work fine.

Saturday, April 25, 2015

After the Rain

Three inches of rain helped our long term drought conditions, but made working outside a mess so I disassembled more of the Fury donor car and vacuumed the interior. Removing several pounds of dirt, rust, undercoating and acorn shells makes it a much nicer place to work. Removed stainless pieces from the inside quarter panels and polished everything. One more detailing job done.

Cut and welded the remaining passenger seat mounting brackets, so they are ready to drill and paint.

Friday, April 24, 2015

Transmission Mount Mockup

Measuring the location for the transmission mount makes me feel like a pilot flying on instruments the first time. A high degree of confidence in what the numbers say, but a nagging mistrust that could be expensive if something is misread.

I tried adapting a cross member from a Dodge truck, as well as the one removed from the Belvedere's forward location. Neither look simple to modify, so I'll have to build it from scratch.
 
Heavy rains last night and this morning, so it's doubtful I can do much outside today. I'll need more material, but last week I bought the last piece of 1/8" steel plate Lowes had in stock. It's either wait for them to restock, or drive to another store. Might check out Home Depot this weekend.

Monday, April 20, 2015

Motor Mounts are Installed

With rain forecast for the rest of the week, I thought it wise to finish the motor mount installation so the bare metal from cutting and grinding doesn't rust before I weld. It was windy again today, so welding was difficult as the gas kept blowing away from the weld. I finally finished, but the welds are not as pretty as they might have been if done indoors.

Because the saddles were cut from a truck donor and were mounted to the side frames, they aren't as tall as the ones I've seen in cars, so I had to scab on several pieces of 1/8" metal to reinforce the brackets. If the car had come with an engine and transmission installed so reference points were available, I could have removed the stock brackets and fabricated the modern brackets to look a lot neater. The way it is, I had to use the stock pads as attach points, and even then it was a guess.

I keep telling myself to quit worrying about neat in places not normally seen, but I hate doing things like that.

Saturday, April 18, 2015

Finally!...Motor Mount Surgery

I ran out of excuses to delay cutting the motor mount pads and begin fabricating new saddle mounts. I took care of that today and will tack weld the parts in place for a fit check if weather permits tomorrow. With no original mounts, or even a transmission cross member to use as a reference point, the locations for new mounts are an educated guess. I also don't have a two or three groove crank pulley that will fit, so I'll install the mounts roughly an inch higher than I think I need to clear the frame. If necessary, I can lower them, but it would be difficult to make them higher.

Tuesday, April 14, 2015

Seat Mounting Brackets

Finished one set of seat mounting brackets so I can test fit the driver's seat. They fit quite well and should also work on the passenger's seat. The major difference is the offset hump that leaves a narrower area for the passenger seat. I may need to relocate some holes so they fall within the reinforced area under the floor.

Next I need to determine the seat fore-aft adjustment limits so the holes can be drilled in the floor. Once I do that, the seats can go out to be recovered.


Also looked at the possibility of using the stock Belvedere side trim from the bench seat. The seats sit much higher than in the donor car, so there is a large gap that needs to be covered. The contour is close to matching the Sebring seat, but would need some trimming and modifying to attach it to the seat and to allow for power seat adjustment. That's a worry for another day.


Sunday, April 12, 2015

4-11-15

Mylar spears arrived in the mail. They look nice despite the larger '58 texture. Wish I was at the point of installing final trim!

Spent the afternoon cutting and welding parts to mount the seats. Also decided to re-design the motor mount brackets to make them simpler. I'll need some more steel, but at least the size I need is in stock at Lowes.

Once the motor and seat mounts are done, I won't have any legitimate excuses to delay joining the body and frame...at least that I can think of for the moment. It's intimidating for a one man operation, but at least I'll be able to hang the body from the shop ceiling, roll the frame under, and lower it with an electric winch. When I installed the truck body and bed by myself, I had to jack and block it out behind the garage. Not fun without help.

Wednesday, April 8, 2015

Gold Side Spears

Ordered gold, textured Mylar material from Jim Rawa to use for the side spears. It has a '58 Fury texture, as '56 is not available. Due to the dimensions and the location of the fuel door within the spear, the material won't work on a stock '56. However, since I reduced the size of the stock spear and relocated the fuel filler, it should work fine for me.

Price is competitive with the paint alternative, and even with the incorrect texture it should appear closer to original than just using metallic gold paint.

Monday, April 6, 2015

Steel and Glass

Picked up some of the steel angle and plate that I need to install seats and fabricate motor mounts. Couldn't get 1/8" steel in anything other than a 4'x8' sheet, so I'll have to order online.

Picked up my side glass and they apparently gave me a discount because of the delay completing the job. Last week I made it clear I wasn't pleased with the two-week wait when three days was quoted. At $89 for two windows, it was about 50% off their quote and even less than the best online prices I found.

Sunday, April 5, 2015

Stainless Steel...Day Three

Easter Sunday and another day to clean, sand, and polish. One more upper door frame shiny and ready to install fuzzies. Two hours yesterday and four hours today, and while the results are less than beautiful, they will do. I keep telling myself it's not a show car, but rather a resurrected from rust, finned, fun car, not a trophy-hunting trailer queen. Had I not taken on the project, by now the quarters, fenders and doors would be transplanted onto another '56, and the rest would have been crushed to make new Toyotas.

Friday, April 3, 2015

4-3-15

Another day of cleaning, straightening, and polishing stainless steel. This time it's interior door panel trim.


Determined configuration and what material was needed to mount seats. Glad I modified the floor shape to be flat, as it makes locating seats much simpler. Will try to find 3-1/2" angle and 1/8" plate steel locally to save shipping cost. Online price is reasonable, but shipping is obscene.

Thursday, April 2, 2015

4-2-15

It's been over two weeks since the window frames went to the glass shop. I called three days ago and they said they would call the next morning to give me a status report, but they didn't...no surprise. I stopped there today and they promised the parts would be done before quitting time.

I installed the first fuzzy strip on one of the interior window frames. I used Arrow 606 wide crown staple, 3/8" long. Works much better than the stainless wire I first tried. I did have to do some drilling where the existing staple holes didn't line up with the gaps in the strip.

Designed new brackets to attach motor mount saddles to the frame. Now I have to find some 1/8" metal to fabricate the parts.

Front Gravel Pan

I can't imagine the reason there was a hole cut in the front gravel pan, and done so neatly with a torch! It's now patched and primed.

Tuesday, March 31, 2015

Motor Mounts

I found parts to fabricate motor mounts at the same place, so that's one more thing I can work on.

Seats and Module

After searching for Sebring seats all over the state, I found a nice set a mere seven miles away, and at less than half the price I was quoted for a set to be shipped in to a bigger yard. These were out of a 2000 model, so they had the seat belt module and harness that will make it much easier to wire. The driver's seat is also powered, so that's a bonus!

I'm soon going to have to decide on interior colors and materials so I can get the seats to the upholsterer. Last time I had some done it took a couple of months to get them back.

Sunday, March 22, 2015

3-20-15

The stainless window frames I worked on just didn't look good enough, so I re-sanded and polished them one more time. The metal surface appears to vary in density, as some areas are easier to cut and polish. There are also veins of yellowish metal that resist sanding, and that don't change much by cutting deeper.

Compared to new, the finish is far from perfect, but compared to what I started with, they are beautiful. Guess I'll have to live with the slightly foggy appearance as well as the few pits that are too deep to remove. If the car is ever complete, the frames will be easy enough to upgrade with chromed Belvedere parts.

Tuesday, March 17, 2015

80F Today and Rain Forecast All Week

Spent several hours cleaning, straightening and patching the front gravel pan. Painted  with rust reformer and primer, then stored it away.

Shared emails with FuryJim to see if the Mylar inserts he makes for '57 and '58 Plymouths can be used to make my smaller-than stock-inserts.

Took door window frames to Binswangers to cut and install new Solex glass. Quarter panel windows are already Solex, but the cracked driver's side door glass was clear, laminated safety glass that had obviously been a replacement at some time.

Received window frame cat whiskers from Canadian company. Will cut and install if rain prevents working outside.

Saturday, March 14, 2015

Going Private

Due to the number of purists and busybodies who insist on dictating their demands to do things their way, I've decided to take this blog private. It will be a historical journal only, not meant to entertain, educate, or inform anyone but me, but I may occasionally open it to previous readers when the time is right.

Monday, March 2, 2015

More Sanding and Polishing

Still below normal temps and not much improvement for at least a week, so cleaning and polishing is all there is to do. Got all the window glass frames done except for final polishing that is waiting for my ultra-fine sandpaper order to arrive.

Also got one door trim to that point. I had thought I might have to scrap the stainless steel parts because of their deep pitting, but they will be useable, if not beautiful.

The part on the right that is nearly complete looked even worse than the one on the left before I began. You cans still see a few small pits that won't go away after the final sanding and buffing, but I don't dare cut them any deeper or the parts will bend and deform too easily.

Friday, February 27, 2015

Restoration on Pause

Got my order from Gary Goers yesterday and I thought it was going to be like Christmas with goodies to unwrap and play with, and light snow expected last night. The forecast was for about 1" of snow, but as of this evening it's 6" deep and rising, so all restoration work is on hold. There are lots of small jobs I could be working, but along with the snow we have 23F and wind, and the small shop heater can't keep it comfortable when it's that cold so I spent the day getting ready for tax time.

As complicated as tax laws have become, I'd almost rather work outside in the snow!

Saturday, February 21, 2015

2-21-15

The up and down weather conditions have not allowed much time to work outside, so when I do have some time I clean, polish and paint the dozens of smaller items that eventually must be restored before they can be reassembled.

The stainless steel side window frames have been the most time consuming. I worked four hours Friday just to complete one side of one window. On the plus side, seeing once pitted, rusty parts gleaming is encouragement to do more.

I had been expecting some rigid window channels to arrive any day, as they had been shipped a couple of weeks ago from a Canadian company. Turns out the package was severely damaged in shipment and returned to the sender. They wrote and said they now had to wait for one of the parts to arrive from the manufacturer to refill the order. Fortunately I don't need them yet, as they were not now sure of the ship date.

I'm also waiting for a shipment of seals and weatherstrip from Gary Goers. My check has been cashed, so I'm expecting that order to arrive soon.

I've located a set of motor mount saddles in a nearby wrecking yard, but they are in a truck and except for the saddle part that supports the mount bolt the configuration is far different than those found in cars. Since the car version is proving difficult to find, I suppose I will have to get the ones from the truck and plan on doing a lot more cutting and welding. The mounts are the only thing stopping me from sending the engine block to the machine shop as I'd like to do a fit check before the block is freshly machined and subject to damage.

Sunday, February 15, 2015

Little Stuff


It’s back to searching and waiting for parts so I can establish motor and transmission mount locations. However, there’s never a shortage of jobs to keep me occupied.
First things first.  I had to cut down last year’s lanatana dead growth, but  my self-propelled Husqvarna mower refused to start.  A shot of starter fluid got it to fire, but when that burned up it quit, so I knew it was a fuel problem. I verified there was no water in the fuel system and when I removed the carb I found it clean as new, but flushed everything with carb cleaner anyway. Still wouldn’t start. I removed the carb again and used more carb cleaner and compressed air on everything. Still wouldn’t start. It took a third time and a thin wire to remove a tiny gob of sticky, tan material from deep inside and partially plugging one of the ports. I have no idea what it was, but no solvent would cut it. Now it runs like a champ, but I wasted two hours.

After my mowing job I finally got back to the car. The first project was cleaning and painting the damper and several engine brackets. Now they are sitting on the shelf, out of the way and waiting for installation. While I was painting, I touched up the frame that has been sitting outside, painted and exposed to the elements for more than two years. Then I scraped decades old greasy, dirty crud from the transmission housing and various engine parts and covers.


Since the weather was nice and I could work outside, I decided to clean, de-rust, sand and polish the stainless steel surrounding the door and quarter window glass. The pitting was deep, so it was a slow, tedious process. I got one window finished and another nearly done, but it took the better part of two days. I’ll still have to disassemble them and replace the bedding channel when it arrives, but at least the stainless looks decent, if not perfect.