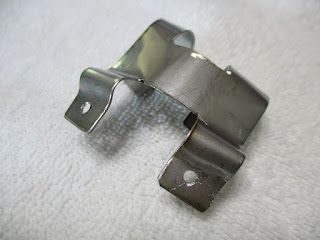
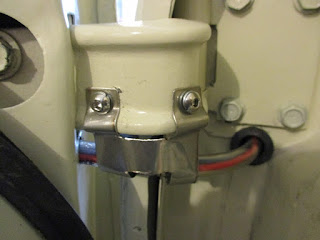
The next task was where I deviated from the manufacturer's instructions out of necessity, not convenience.
If the wire bundle was required to fold between the door and the body hinge area, the wires would soon break, so the kit provides a way for the bundle to slide into and out the body when the door is opened and closed. In their version, the bundle is protected by routing it through a flexible extension spring that prevents the wire from sharp bends as it slides into a nylon tube grommet and into the space behind the body hinge area. Their method would probably work fine with a tall, thin door like those on thirties and forties model cars, but by the mid-fifties, the doors had become shorter and curvier, and some structures less roomy so I was unable to mount the kit hardware according to their plan.
After playing around with different ideas, I decided to see if I could closely duplicate the stock method that Chrysler used in 1956. Once again, I didn't have the stock hardware, nor did I know how it was installed, but Ron Waters sent me a picture on Facebook that showed how and where the bundle was routed using a special bracket to retain, shape and protect the sleeved wires. The design looked simple enough so I tried a couple of configurations and it looked like it would work if I could attach the sleeved bundle to the hinge and align the body and door holes well enough to allow the bundle to slide.
I drilled the sheet metal holes successfully but here wasn't enough room for the long nylon grommet inside the body panel so I shortened it about an inch and that seemed to work quite well, but I could see no way to use the spring for protection.
I then spent a lot of time drilling and tapping threads in the hinges and managed to do so without breaking a tap! The bracket design I made from stainless steel also worked fine with only minor tweaking when installed.
The next task was to route and terminate wires so I could mount the GM style switches in the door panels and lastly, to functional test the switch operation.
After everything was done, I discovered that I somehow managed to crack the passenger side glass, so now I can undo most of that installation. One step forward and two steps back! Just for kicks, as long as I will have the glass and modified kit frame out, I'll see what can be done to modify and use the stock lower frame for better support. My first guess is that I might be able to get by with the OEM lower frame by cutting off the unneeded appendages and welding two 1/4" studs on the lower channel. I wish I had looked at doing that earlier.
Everything tested great, so now I've switched my efforts to updating the electrical schematics.


No comments:
Post a Comment