Search This Blog

Wednesday, July 29, 2020

Hood Lettering Repair


As usual, the majority of the pins that locate and retain the hood letters were broken or missing. They had already been re-chromed, but whoever did that job neglected to repair the pins before plating. Since I had been concentrating on installing the brite body trim, the Plymouth name on the hood was next on the agenda. The repair process was time consuming, but not difficult since the results of the pin installation would not be visible from outside the car.


I prepared the letters by first cutting the broken pins flush with the back of the letter and drilling new holes in the original pin locations. A new, very sharp, 1/16th inch drill bit easily cut the old pot metal, and the holes were then finished to size with a Dremel and a small bur tip. I oversized the hole enough to fill with plenty of five-minute epoxy to hold the pins securely. The new pins were cut from small panel nails.


I let the epoxy cure overnight and then installed the letters with a dab of trim adhesive where the pins protruded through on the back side of the hood sheet metal. It was just one more thing that wasn’t stock but the results worked out fine for a daily driver.


No pictures yet, but I installed the headlights today. Once again I’ll have to loosen several bolts that mount the grille parts and adjust every attachment point before the pot metal headlight surrounds will clear the grille. It must have been frustrating for the factory workers to custom-fit and adjust every car coming down the line.

I'll have to wait to accomplish the final tweaking when the re-chromed hood-lip pieces return from the plating shop.


Monday, July 20, 2020

Hood and Headliner

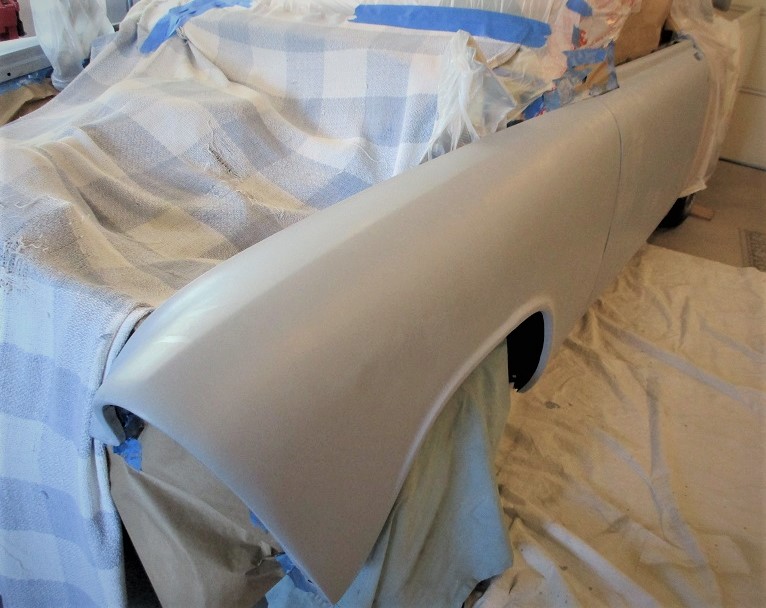
I repainted the hood three days ago and while it is better, it is still far from perfect. Remnants of the shallow hail dents are still visible, but I think most will disappear with color sanding. The paint has cured for three days now and should be ready to sand. 

Since I’ll be helping my wife celebrate her birthday today, I might not get time to work on anything car related, but I am anxious to finish the hood and get the last sheet metal installed so I might sneak into the shop for a little while!
 
While waiting for the repainted hood to cure, I replaced the cat whiskers in the door glass flippers and installed the headliner shell so I can determine the final trim lines.

 Ireceived the generic vinyl trim I ordered to see how it would look with the fiberglass shell. The factory pieces were cracked and broken and even if they had been usable, the OEM configuration wouldn’t work with the shell.
The fit seems to be okay but looks much different than stock. The color is more gray than it appeared in the manufacturer's catalog and I would have preferred a gold or tan tone. However, if I can find a fabric with a close color match it should do the job. Internet colors never look the same on a screen, so I’ll have to visit an upholstery shop to order from their sample charts.


The rivets I needed to replace a part on the flipper assembly arrived, so that job is done. I had to order a package of 100 to get the two rivets I needed, but a package was only $5.55 and I now have a lifetime supply!  If you ever wanted to know the part number and a source for those tiny rivets, here’s the info, and if anyone needs some to repair your project, let me know and I can send you a few for the price of postage.


Monday, July 6, 2020

Beginning to look like a car!

Record rains continue and summer heat will arrive this next weekend. Meanwhile, though not accomplishing much of importance, I did finish color sanding and cutting with compound and buffer. I'll wait to polish after it's running and ready to hit the road. Also finished a few visuals of body and trim installations. Both bumpers, along with the rear wings are now in place. I had planned to leave off the rear bumper guards, but if I do, the point where the wings attach to the bumper look unfinished, so for at least the time being, the guards remain.


Installed the trunk latch and release button along with the trunk seal. Looks like I will have to further slot the adjustment screws to make the trunk fit tighter.

The grille is in place and adjusted. That involved a lot of tweaking, but it came out okay.


Door handles also work fine so I should be able to glue in the seals. I will have to make some hinge adjustments on the doors as I'm not satisfied with the way they fit.


The hood paint job looked really bad so I'm working on it again. It apparently suffered hail damage at some point and despite a lot of leveling and sanding, there were too many shallow depressions visible while sitting behind the wheel and looking over the hood, so it's back to blocking with a long board.

As posted a few months ago, the hood really should have been replaced with a better one before even starting to repair it.

I finally created a tool to make it easier to attach the door-window frame cat whiskers to the stainless steel trim parts. Now it now takes only a minute to clamp the parts together and drill holes for the staples to fit. Trying to use the original hole staple locations was a big pain and very labor intensive, and I wasn't eager to use pop rivets.

Both doors will be ready to install the power window hardware as soon as the re-chromed window frames are done. No word from the plating shop yet, but I didn't expect them to be done this soon.

Not sure what to use to plug the holes for the door locks, but will probably just install the unused key receptacles for looks only. If I eventually decide to install locks, I'll use solenoids and hidden buttons or a remote.

I'll probably work on the headliner next. It needs to be in place before I can permanently install the "flipper" assemblies above the doors. I need to decide what method to use to attach the fabric to the sheet metal as the stock flexible vinyl molding is not reproduced and the original is in bad shape. The shell will have to be propped in place so I can try out a few ideas for mounting before I order the fabric.


Friday, June 19, 2020

Vent Windows and Stuff


Once the paint covered all the bare primer, it was amazing how much more inspired I became! Okay, so there is still a lot of color sanding to take care of, but there is also a lot of trim and seals that can be installed now.

The vent window assemblies were complete less the glued-on rubber seals, so I finished that part and began installing the windows. It was another visual accomplishment to fuel my enthusiasm.


To fuel it a bit more, I decided to make the back end look more finished, and the bumper, splash shield, and hinged license plate frame/gas-fill cover are now in place. The trunk lock and pot metal “V” passed a fit-check, but must wait to be fastened in place after color sanding the trunk.


Today, some of the last chrome parts went to the re-plating shop today. I should have brought them in earlier as I just realized the stainless-steel window frames will have to be attached to the glass before I can install the power windows.

Last week I ordered the mufflers and tailpipes from Waldron. I should have ordered them earlier too, as the quote is 8-weeks for delivery. They have the tailpipes in stock, but the mufflers are made in Canada and their factory just reopened after being closed for the virus, so I guess it wouldn’t have done any good to order earlier!

Exhaust pipes will have to be fabricated at a later time in a local shop, so my plan is to temporarily install flex-pipe so I can start the engine and sort out all the inevitable problems that are waiting to surprise and frustrate.

I look back at the last ten years of dreaming, designing, repairing, fabricating, learning, and changing nearly every part and I realize that only the basic sheet metal shell is anywhere close to stock, and it too has been massaged and/or altered functionally…if not so much visually.

Inside, the changes are even more extreme from floorboards to headliner, and everything in between. About the only things recognizable to a stock ’56 Plymouth owner would be the control knobs on the dash, but I hope I will have been able to make the changes look like they might have come from the era.


Wednesday, June 10, 2020

Paint Progress!


Yes, most of the car is finally one color! A few days after the D-Day celebration, I celebrated P-Day, and that is indeed worth celebrating!

I’ve not been able to post for a week as my Internet service crashed last Thursday and didn’t return until today. Online tech support couldn’t figure it out and the local technician couldn’t come out until today.

The problem was initiated by a robocall that bypassed my answering machine and tried to leave a message at the phone company, and that locked up the automated system. Then when online tech support tried to fix the mess, they corrupted the troubleshooting program. Fortunately, the tech that came out had just finished fixing the same problem for two of my neighbors, so I was back online in a few minutes.

The weather cooperated nicely the last several days and I was able to paint the fenders, doors, hood, and front gravel pan. The trunk lid a rear gravel pan are left to paint, but I hadn't properly mounted the trunk lid and had to wait for that before painting.

I'm satisfied with everything except the hood and I had been worried about it since day one. The underside surface was pitted, and it needed several patches to strengthen the supporting structure. It looked like crap after painting, but I wasn’t about to take too much time to make that part look nice, since the pad will cover many of the worst areas.

The top surface had also been damaged extensively by hail some years ago and I did a poor job of leveling all the tiny dents. Some can be removed by color sanding but I’m quite sure it will require more filling, leveling and repainting to look acceptable for even a daily driver. At least I will be able to finish the doors and fenders and then mount much of the exterior trim. If necessary I will locate a better hood to restore.

Anyone who has assembled a ‘56 grille knows what a pain it is to adjust all the parts to achieve a good fit, but I managed to accomplish much of that today, and it came out okay, if not perfect.


The paint will have to cure for another day before I can begin color sanding and it will be nice to get that part of the job done. I think I have enough sandpaper, but I’ll need to order a new buffer pad before I can finish final polishing.

I can’t wait to get back to the interior again!

Saturday, May 30, 2020

P-Day Coming Soon?


The weather is nice with no rain expected for a couple of weeks and my latest homeowner repairs are complete, so maybe P-Day…Paint Day…is finally in sight!

I finished filling the last of the tiny dings and dents, and the last touch-up coat of high-build primer will go on tomorrow, so  with a little more sanding I should be ready to paint early next week.  Then a couple of days to clean, dust, prep and re-mask, and it will be time for me to quit procrastinating and take the big step!


Since I have to paint inside the garage without a booth, the roll-up door will have to be open to ventilate the fumes. I'll need a day with moderate temperatures with light winds from the west or northwest, and if the ten-day forecast is anywhere close to accurate, it looks like June 10th will be in the middle of several days suitable for spray painting.

Keeping my fingers crossed!

Tuesday, May 19, 2020

After the Haunting

I'm beginning to think my house is haunted, or maybe it's related to the '41 Chevy that was my first car in 1955. When the old Chevy wheezed its last, I filled it full of bullet holes, so the house better pay attention!

I might not be fighting ghosts and demons, but considering everything we did to build in extra-high quality, I'm really fed up with our custom built house. In the seven years since we moved in, nearly every mechanical device in the kitchen has failed, as has the HVAC many times.

The latest failures have been the HVAC that now needs a new coil due to a leak. It is the second one to need replacement in two years. It was also repaired and several parts replaced while under warranty, and has never functioned the way their manual states.

Three backyard flood lights also crapped out in the past three weeks and the built-in microwave died three weeks ago. This was within a couple months of the death of the third ice machine, the clothes dryer, the dish washer, and the kitchen sink faucet. Yesterday, one of the garage door openers malfunctioned, but apparently my cursing helped as it seems to have at temporarily repaired itself. At least I can hope.

Oh, yes, the new mower blades and platform belt  arrived and I got the old mower running again. After waiting for five inches of rain to dry enough to get my soggy acre of grass mowed, I think I might have caught up with the trials and tribulations of home ownership!

Today, I managed to apply a couple coats of high-build primer on the doors and fenders. Maybe I can do the same on the hood and trunk lid this week so I can have everything ready for paint...if the weather cooperates and the house doesn't self-destruct again.

I tried something different when I applied primer this time. The vendor instructions say the high-build product can be applied with a roller, and since I have yet to build a temporary paint booth I thought I'd give the roller a shot. It was a much easier and less messy to apply, but  I'll try sanding a little bit tomorrow to see how it looks.


Monday, April 27, 2020

Another Scandinavian Forward Look Project

First up was Ray's Canadian '56 Plodge, while yet another '56 station wagon project belongs to Geir, a Forward Look enthusiast from Norway. The basic trim level will be upgraded by adding parts and pieces from a Belvedere, and maybe some custom interior parts. Sort of like mine, he hasn't decided exactly what all he wants to incorporate, but that early Dodge Hemi should be a perfect fit.


I envy this rotisserie! If I had it to do over again, it would be the first tool I would have purchased. I could have saved hundreds of hours when I was replacing floors and trunk panels.


He still has a lot of work left on the wagon, but he also owns this beautiful Savoy sedan.


Saturday, April 25, 2020

Invitation to my Readers

Geir, Ray, and anyone else with a '55 or '56 Mopar project, pictures are always welcome and I hope you will share them with us. I've posted a few guest photos in earlier entries, but as your projects progress it's fun to see what you've accomplished. I don't discriminate if it's a serious restoration, a wild custom, a hot rod, or a Mopar mutt, like mine. If you'd like to tell us all about your car, that's also fun to read.

Just email your photos and text to GaryS1941@gmail.com and I will post them here. For starters, here are a few pictures of Ray's '56 Plodge wagon with a Dakota clip, modernized drive train and an impressive and plush interior.


Thursday, April 16, 2020

Hood Installation

One more visible task completed!  Thanks to the damn virus quarantine, there was no one I could call to help with the hood installation, so once again I had to muddle through the job alone, but at least it's now in place.

I had to mount another support hook in the ceiling so I could suspend the hood from a rope. It only took an hour to get it close enough to install the bolts, and another three or four hours to make all the adjustments. I only have to fill and sand two small dings near the hood ornament mounting holes, and the body will be ready for primer, final prep and paint. I'm not sure if I want to mark the mounting locations so I can remove the hood before painting, or if I want to paint it while in place. If I was sure I would have help after painting, it would be easier to spray and color sand, but if doing it alone again, I'm scared that I might scratch or chip the new paint. Decisions, decisions!

Now, if I can get a paint booth built so I will be ready to spray if the weather ever decides to cooperate.


Not that anyone would notice, but I took these pictures before making adjustments, so the gaps are not even. All in all, it came out nicer and with fewer adjustment issues than expected.